
Speaking of changes, discovering the magic circle (sometimes called the magic ring) a few years ago changed the way I crochet. Though it's a bit tricky to understand at first, it is far superior to the chain method of starting crochet in the round. I use it every time a pattern calls for working in the round even if the pattern doesn't specifically require it. Since the magic circle is such an important feature in crochet and in my own patterns, I wanted to give you a clear, step by step tutorial for how it's done. Let's change the way you crochet, too! These instructions are best suited to people who are right-handed. Are you ready? Let's make some magic!

When learning something new it's always best to work with a light color so you can easily see your stitches. Don't work too tightly as we go along or your ring will be difficult to handle. Maintain a nice, moderate tension.

To begin, arrange your yarn over the pointer finger of your left hand and under the middle finger. Note that in this picture the end of the yarn is coming down the bottom.

Now, holding onto the yarn end, wrap it around your middle finger twice. You will pull it towards you as you do this. When you have it wrapped, let it rest under your middle finger again.

Insert your hook under the two wrapped strands from right to left.

Yarn over and draw up a loop.

Yarn over again.

Pull through the loop that was already on your hook. You now have a secure working loop.

At this point you can carefully slide the ring off of your finger. Since we will be working single crochet into our ring, I chained 1. If you were working half double crochet you would chain 2, for double chain 3, etc.

For your first round you will work directly into the ring under both strands. Here I have inserted my hook from right to left.

Draw up a loop.

Finish your first single crochet stitch. For our practice today, we will make 8 single crochet stitches into the ring not including the chain 1.
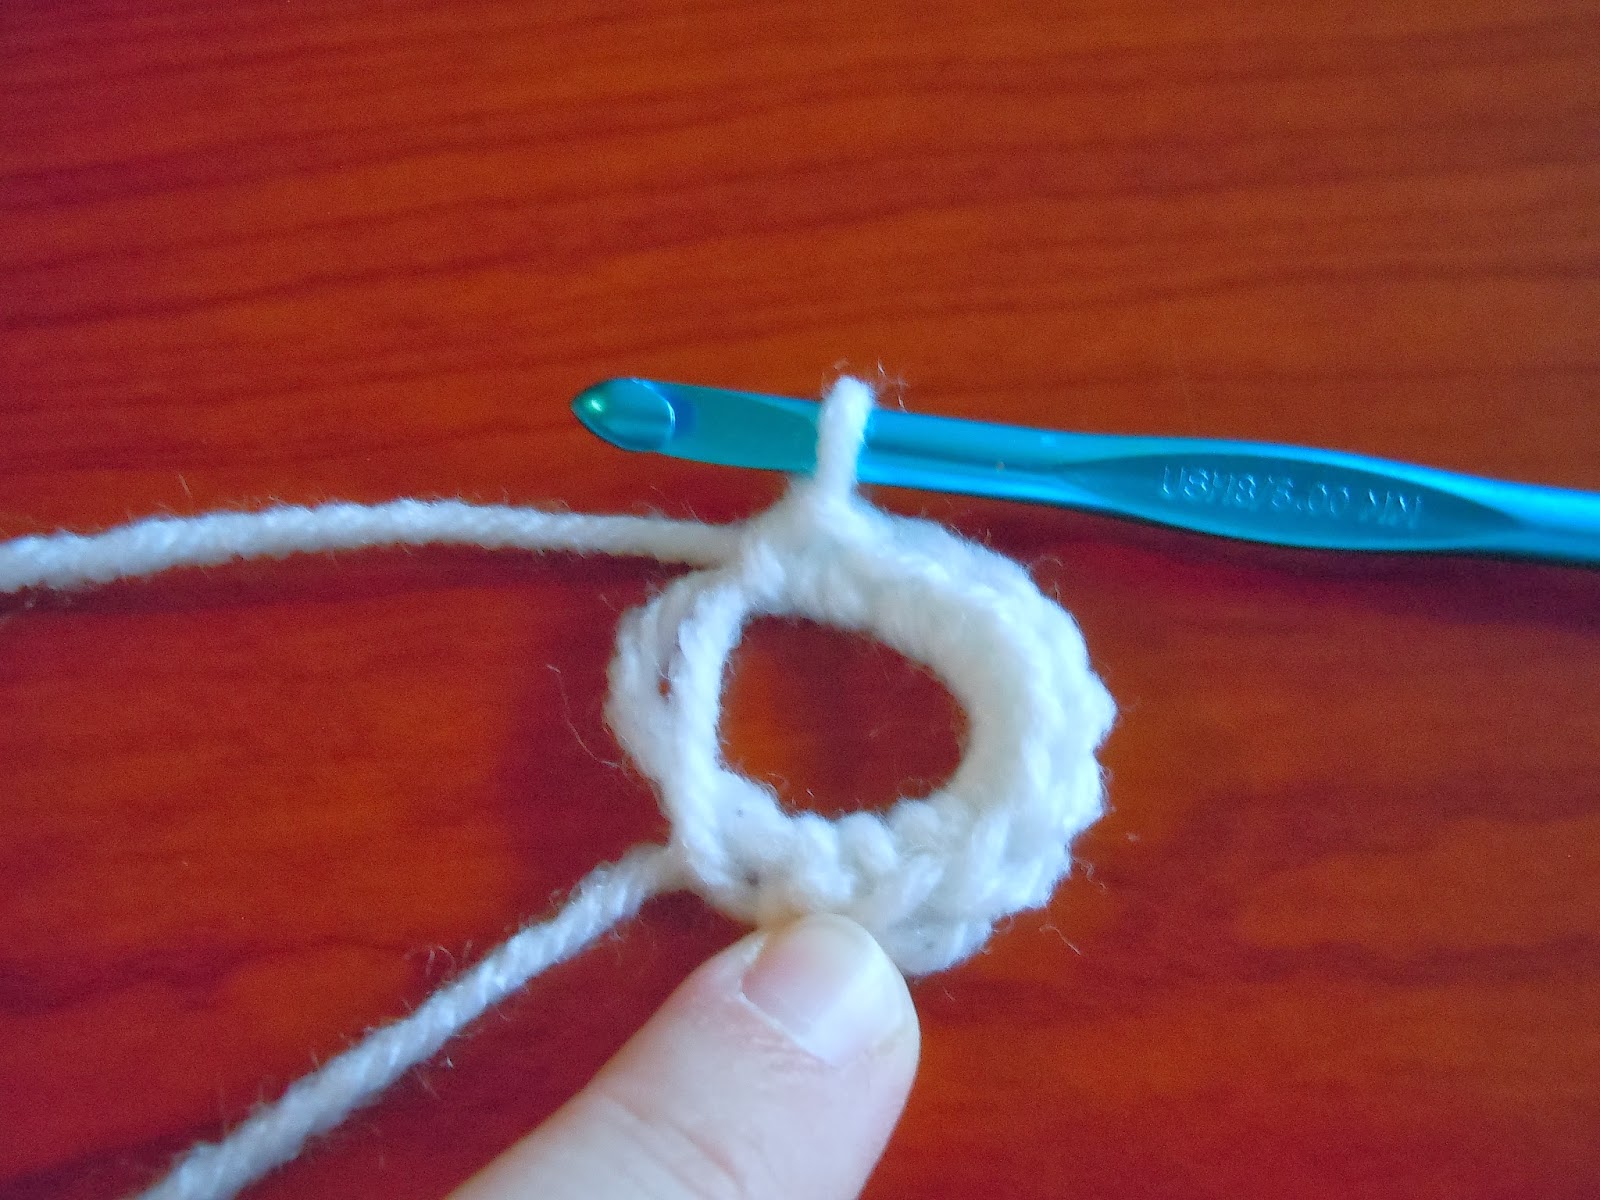
Here I have finished working my remaining 7 single crochet stitches just like I made the first one. I am ready to close my circle so I can connect my round and begin round 2.

This is the step where many folks get tripped up, so take things nice and slow. Gently pull on the short tail, noticing which of the two inner strands tightens as you do.

Here you can see that one strand has been tightened slightly and is now on the inside towards the middle.

Grasp the tightened strand and pull firmly until the loose strand is tightened all of the way. Do this slowly and you will notice which side of the strand to pull.

You should now have one strand that has been tightened all of the way and one that is still loose.

Firmly pull on the short tail once more to tighten the loose strand all of the way.

Your magic circle is now tight.

Slip stitch into the chain 1 or the first single crochet stitch to finish your first round. You would now be ready to start round 2 of any pattern worked in the round. Your pattern should tell you which location to slip stitch into, as well as whether or not your turning chains count as stitches.

Here is a side by side comparison of 8 single crochet stitches worked into a magic circle (left) and 8 single crochet stitches working into a chain 4 joined with a slip stitch (right). See how much smaller and neater the hole made by the magic circle is?
If you have any questions about this tutorial or magic circles in general, don't be afraid to ask them in the comments! Your comment won't show up right away since I have to moderate all comments to weed out the spam and trolls, but it should appear within about 24 hours (usually sooner).
No comments:
Post a Comment
Please share! Note that due to spam moderation there is a delay in comment posting.